
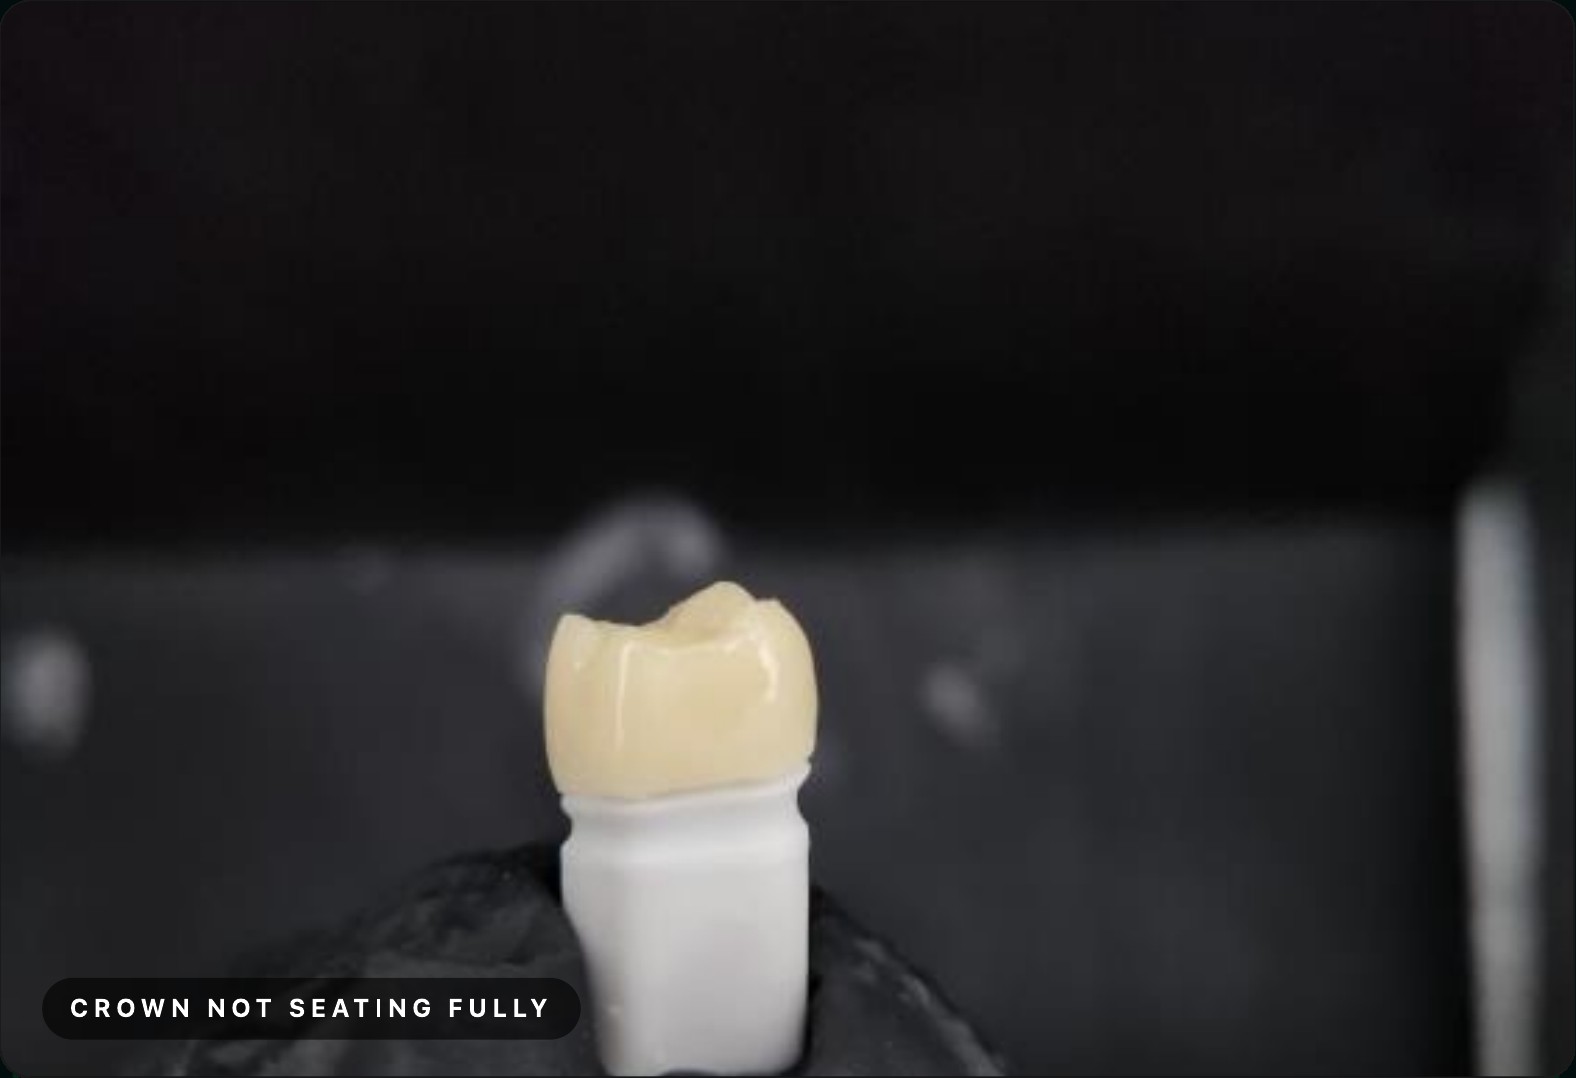
You checked the insertion path, cleared the undercuts, and the crown still rocks or sits high at delivery. The next place to look is the margin line. In CAD, the margin line tells the design where the crown ends, so a blurry or stepped margin carries straight into the restoration you seat. This guide covers the two checks that decide whether a crown seats the first time, plus a short checklist to run before you finalize.
Want to keep this guide at your workstation?
The short version
The margin line is the boundary the CAD software designs the crown to. If that line is blurry or stepped, the crown edge is built to the wrong place, and the error shows up at delivery. A sharply defined margin gives the design an accurate finish line, so the crown can seat fully.
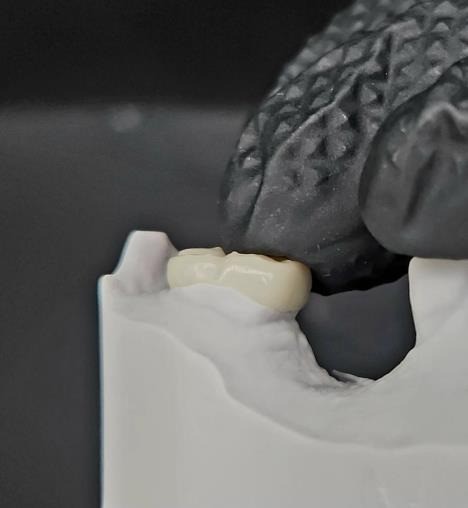
A poorly defined margin can lead to:
A crown can look perfect on screen and still fail to seat because of how it was set to go on. Before you rework the margin, check these three CAD mistakes. The examples below are from exocad.
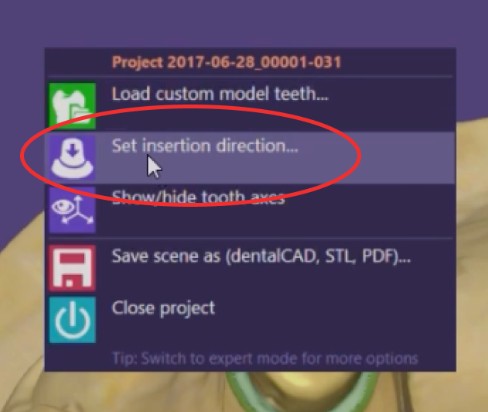
Switch to Expert Mode and open Set insertion direction before you design, so you know the path the crown will take onto the prep.
Look for the red-highlighted areas on the prep. These are typically undercuts.
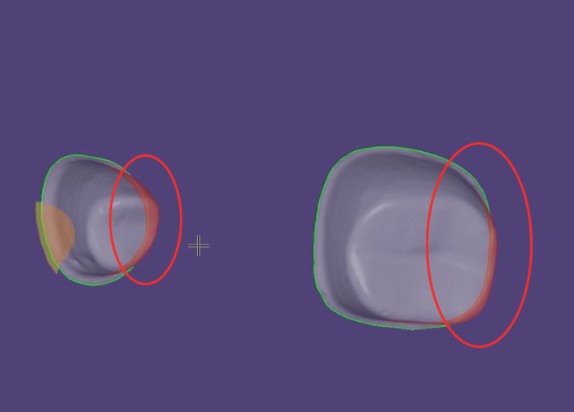
Adjust the insertion path to reduce the red zones, then regenerate the crown base for a precise fit. The fix takes about 15 seconds, and it happens before the crown ever reaches CAM.
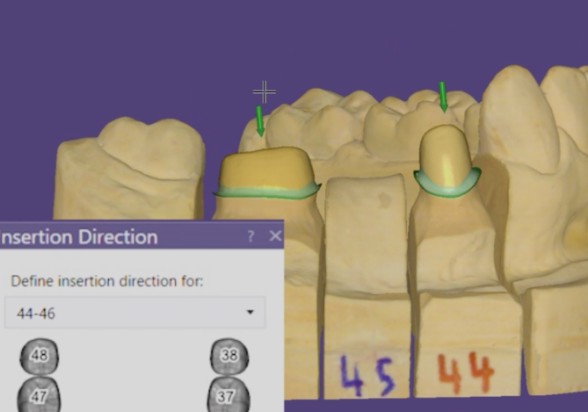
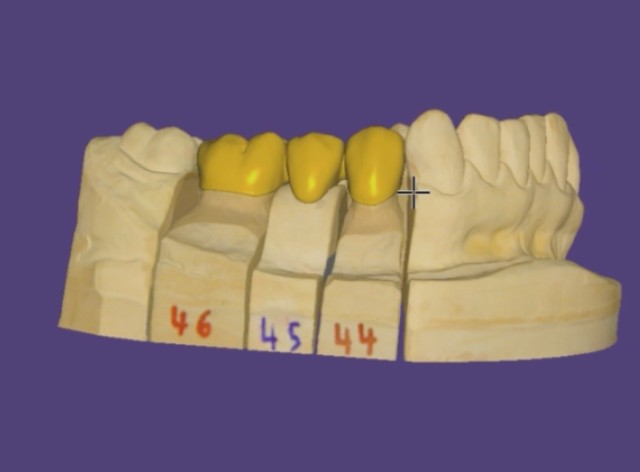
If the fit is still poor after that, move on to the margin line.
The accuracy of a margin line depends on two things: the resolution of the scan you trace it on, and how closely you zoom in while tracing. A low-resolution scan hides the finish line, and tracing from too far out turns a sharp edge into a guess.

What you should do
Pro tip: Small tracing errors at the margin become fit errors at delivery, so slow down where the finish line is hardest to read.
An undercut can hide part of the finish line from the insertion direction. If the margin disappears in the set view, there's an undercut blocking full seating. The fix is to change the view until the whole margin line can be seen.
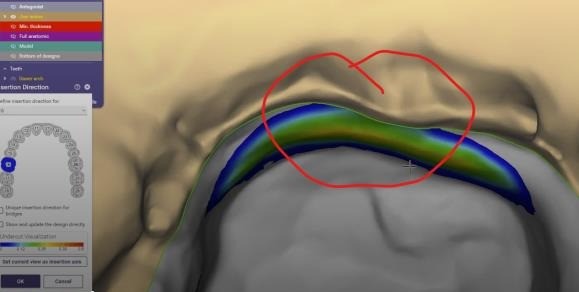
What you should do
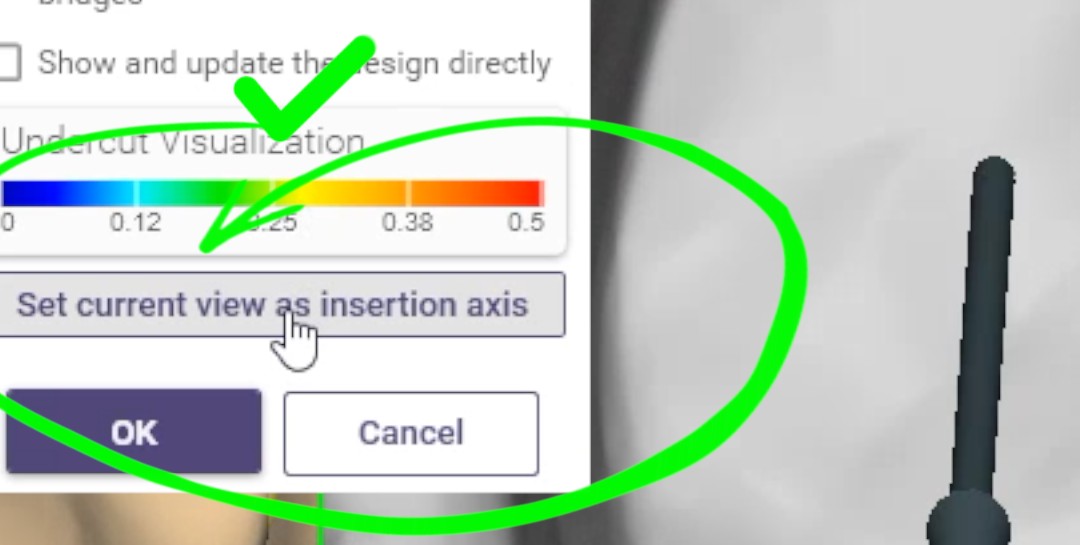
Pro tip: If you can't see the whole margin from the insertion direction, the crown can't seat fully on it.
A clean, sharp margin allows cement to flow evenly, so the crown seats completely. That is what turns a design that looks right on screen into a crown that fits in the mouth.
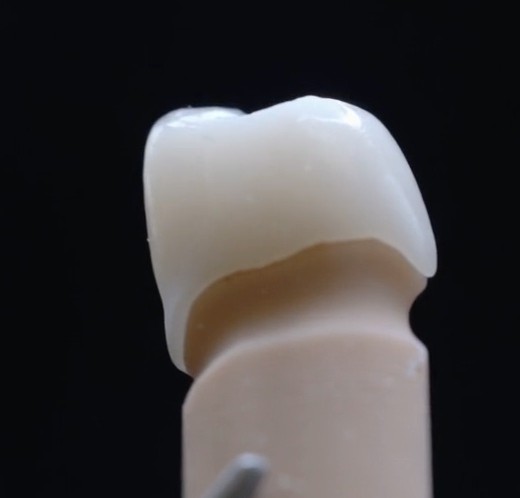
In CAD, the two most common places to look are the insertion path and the margin line. An undercut along the insertion path blocks the crown from going all the way down, and a blurry or stepped margin line builds the crown edge to the wrong place. Check the insertion path first, then the margin.
The margin line is the traced outline of the finish line on the prepared tooth. It tells the CAD software where the crown ends. The crown edge is designed to that line, so its accuracy decides how well the crown meets the tooth.
Zoom to 400% in your CAD software when tracing margins, on scan data with a resolution below 10 µm. At that zoom you can follow the finish line closely and keep the margin sharp and continuous, with no blurry or stepped segments.
Switch to Expert Mode and open Set insertion direction. Red-highlighted areas are typically undercuts. Rotate the model until the red zones are reduced and the whole margin line is visible, then click "Set current view as insertion axis" and regenerate the crown base.
A poorly defined margin is one cause. Blurry or stepped margins lead to open contacts, crown rocking and more grinding at delivery. Tracing a sharp margin on a high-resolution scan and confirming the full finish line is visible from the insertion direction removes that cause before the crown is made.
Send your next case to the EviSmart CAD team. We'll handle the margins.
Planning a cosmetic case next? Read how to present a smile makeover, from case presentation to same-day temps.


