
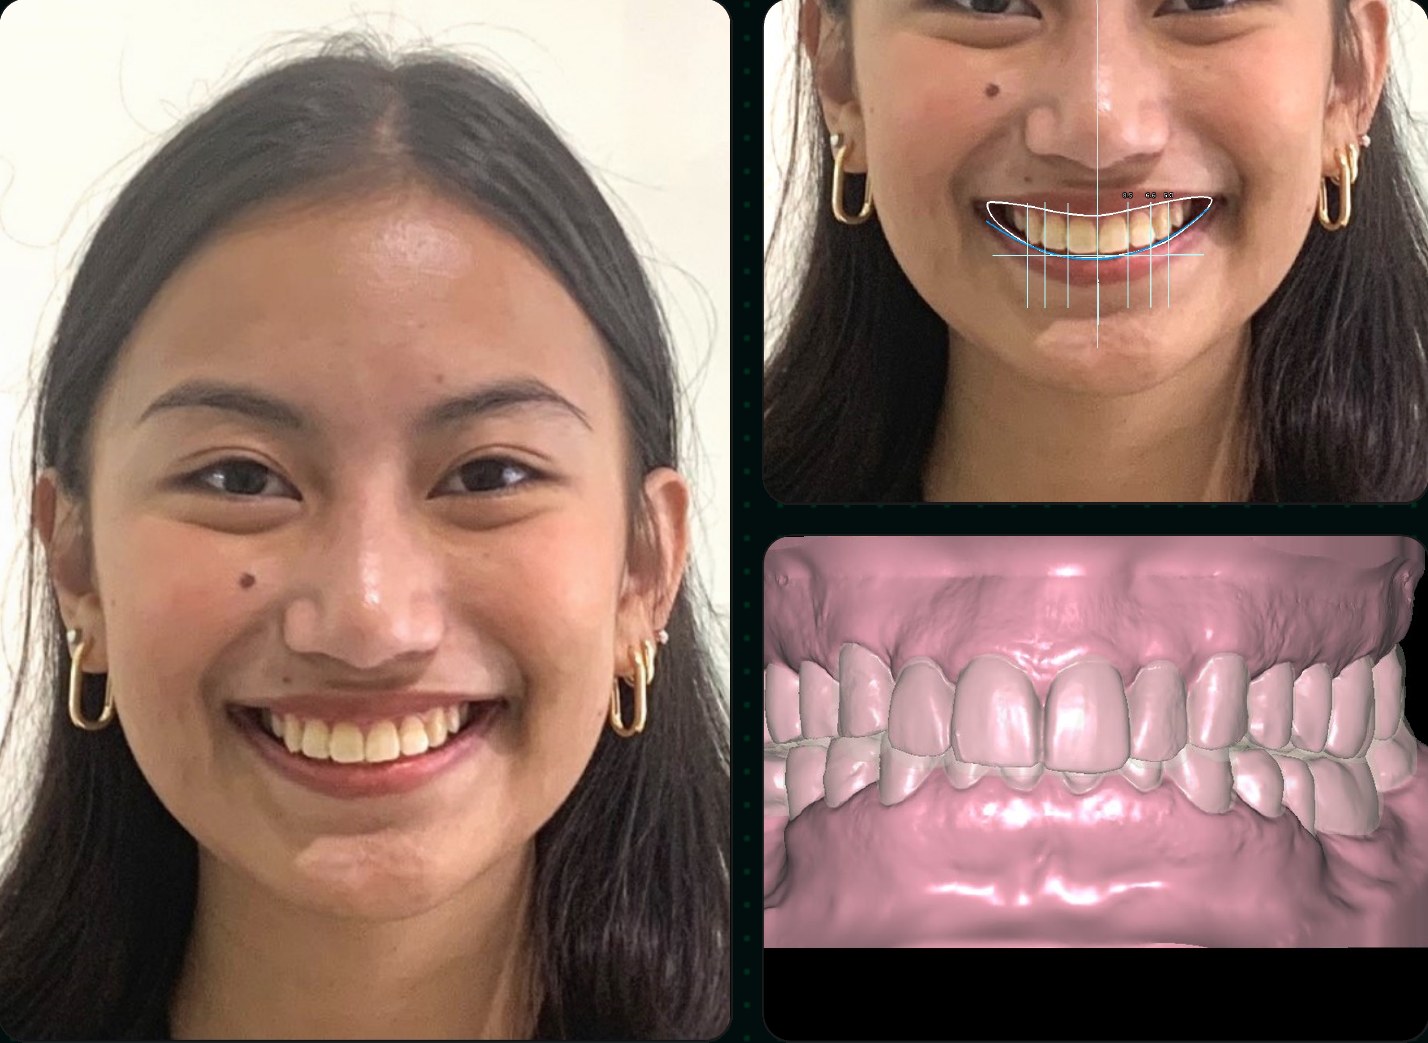
A smile makeover is usually won or lost in the consult chair. The patient has to picture the result, trust the plan and accept what it involves before any prep begins. This guide walks through a five-step workflow that takes one patient from the first presentation to same-day temporaries, using one set of design files: a Digital Smile Design presentation, a 3D diagnostic wax-up, and temporary and final restoration designs.
Want to keep this guide chairside?
The short version
A smile makeover case presentation is a visual walkthrough of a patient's treatment plan, shown before any prep. It uses the patient's own photos and scans to show the problem areas, a before-and-after smile mockup and a 3D diagnostic wax-up, so the patient sees the outcome and the trade-offs before saying yes.
Digital smile design (DSD) is the method behind it. A review of digital smile design in PubMed Central describes DSD as an approach that analyzes a patient's smile from scans and photographs.
The files only do half the work. The order you show them in does the rest: emotion first, clinical detail second, limitations before anyone picks up a handpiece.
Every step below builds on the same records, so get them right at the first appointment:
Start the presentation with the patient's existing smile and current tooth condition, not the treatment or the fee. Seeing their own smile in a calm, non-clinical setting gets them thinking about their own story instead of the instruments and procedures they may be nervous about.
Once they're engaged, give a short overview of the treatment options, then show the before-and-after 2D smile mockup. That's the moment the plan stops being abstract.

How to run it
Pro tip: This stage is about opening the conversation. Hold the clinical detail for Steps 3 and 4.
A 3D diagnostic wax-up is a digital model of the proposed result, built on the patient's own scan to your specifications. Once the 2D mockup has won the patient over, put the initial scan next to the wax-up. The side-by-side shows how personal the plan is and backs up your expertise.
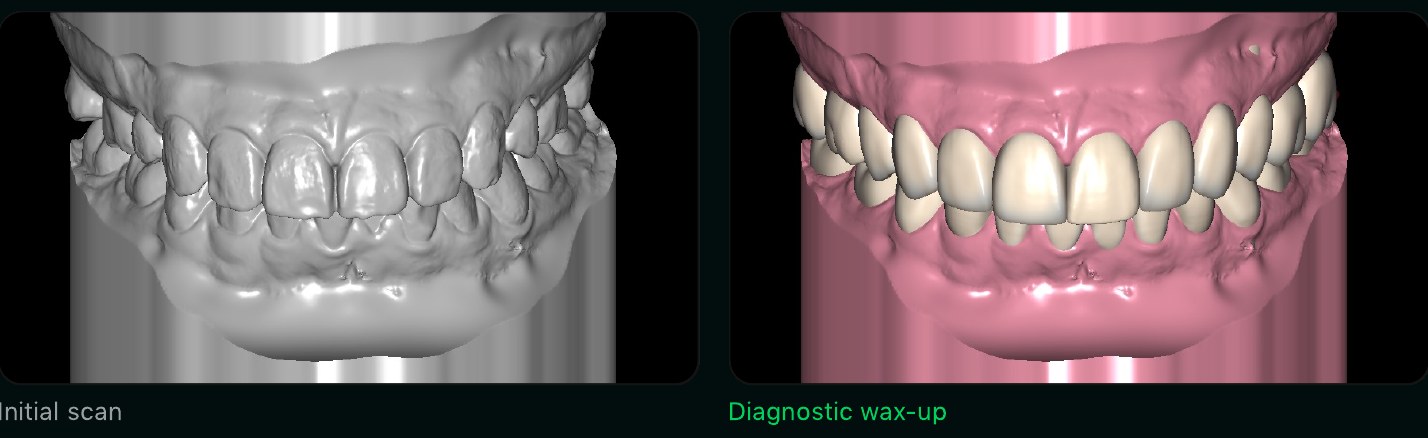
Because the wax-up arrives as an STL file, you can print it and let the patient hold the proposed smile in their hand.
Walk through every view

Pro tip: If the patient doesn't like an uneven gingival height, go back to the wax-up design and adjust it before anything is fabricated.
Function fixes the bite, but esthetics is what the patient remembers. The smile design plan focuses on their esthetic concerns and gives you room to show your artistry next to the clinical reasoning.

What to discuss
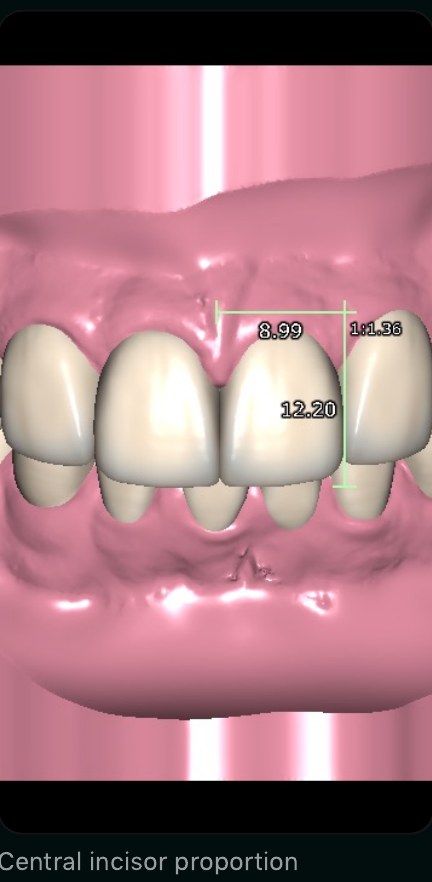
Pro tip: Take patient photos in high resolution so the image doesn't degrade when you zoom in on central incisor proportions.
The wax-up closely represents the final result, though minor adjustments can still happen during treatment. Say that up front, and use the wax-up to show any limitations before the patient commits.
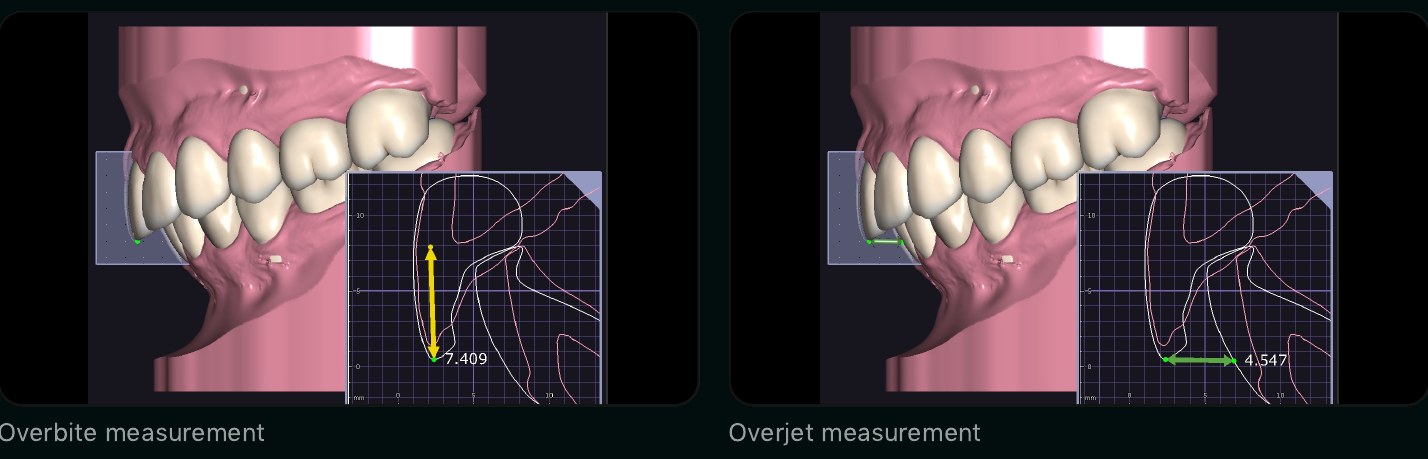
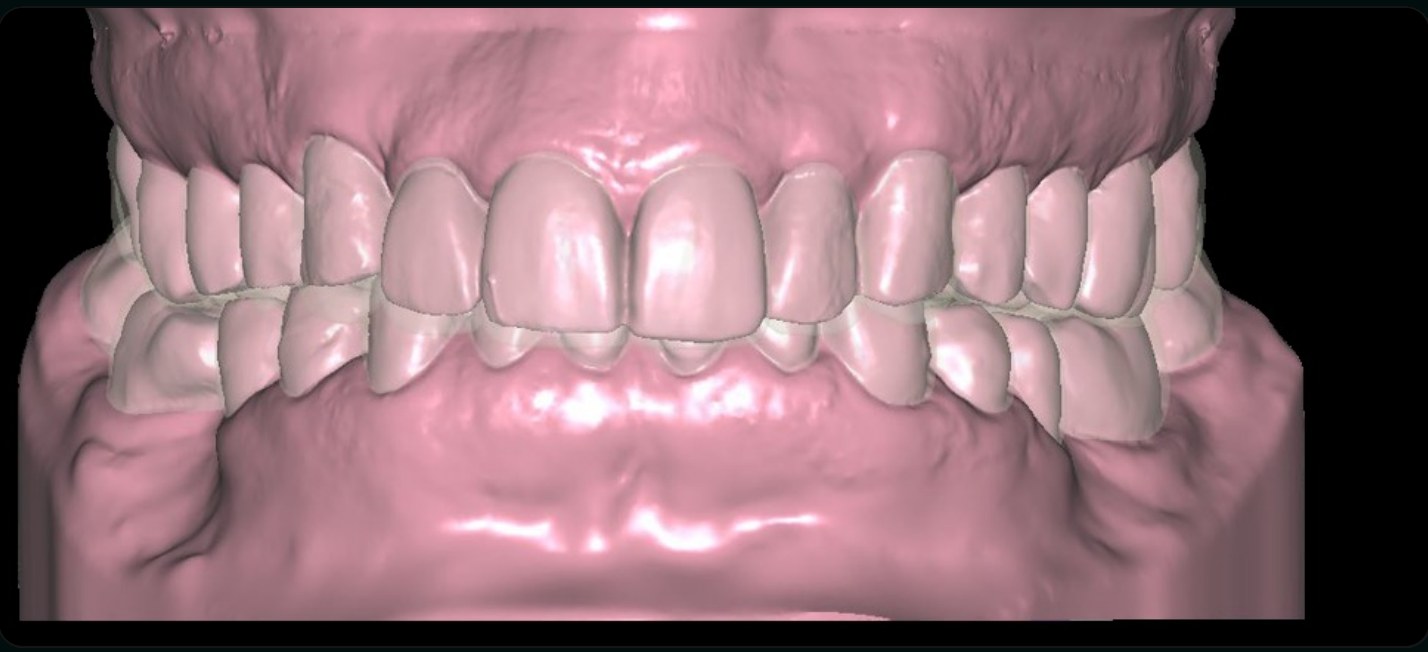
Sectional views show how each tooth will change and how much preparation it needs: none, minimal or ideal. For a Class II closed bite, showing the overjet and overbite measurements lets you explain what treatment can't change while still showing the result the patient can expect.
Overlaying the original scan on the wax-up in half-solid color shows the patient exactly what changes, and shows you where to prep. A prep guide takes it a step further. Much like a surgical guide for implant placement, it works as a roadmap, so you aren't estimating reduction chairside.
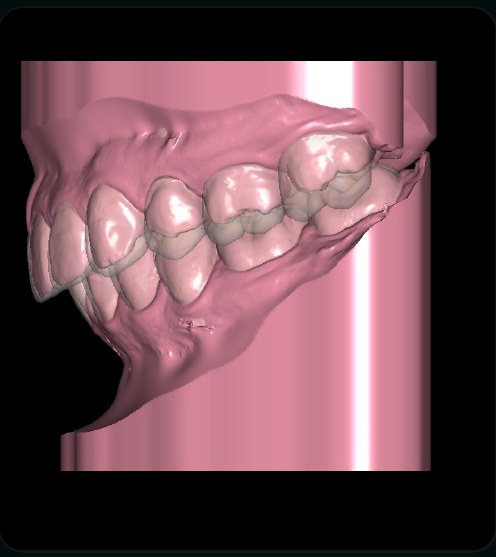
Pro tip: Discuss the limits of the proposed treatment before you start, with the wax-up as your reference.
You can seat temporaries in the same appointment as the prep. When the case is pre-booked, the patient waits about an hour while you receive the temporary design, print it and cure it.
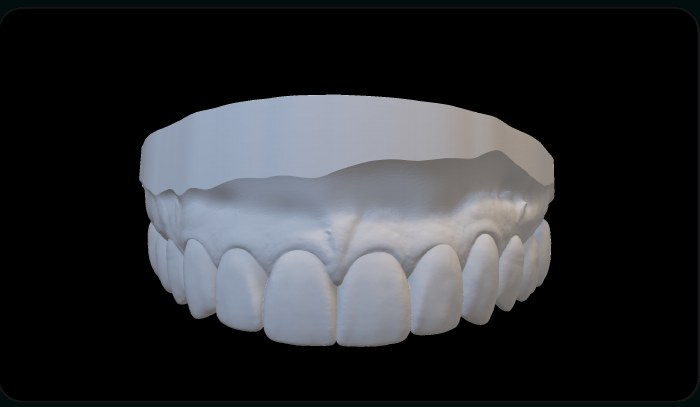
The wax-up design gives you two routes. You can print the wax-up model and make a putty matrix for light-cured, composite injection-molded or snap-on temporaries. Or the design team converts the wax-up into a temporary design matched to your prep scan, and you print it chairside.
The same-day temp workflow
Pro tip: Pre-booking is what keeps the one-hour turnaround predictable. Same-day chairside design support covers your temporaries and final restorations, and you can check current design turnaround times before you book the patient.
The EviSmart Smile Package covers every file in this workflow for one smile makeover case. We built it with hundreds of dentists, so the consult, the plan and the temps all come from one design.
Every Smile Package case gives you:
Start with the patient's current smile, not the treatment or the cost. Show a before-and-after 2D mockup to create an emotional response, then make the plan tangible with a 3D diagnostic wax-up. Walk through the esthetic plan, and cover limitations and prep before treatment begins, so nothing surprises the patient at delivery.
A diagnostic wax-up is a 3D digital model of the proposed restorations, built on the patient's own intraoral scan. Dentists use it to preview the result with the patient, check function and plan tooth preparation. Delivered as an STL file, it can be 3D printed in the office or used to make a putty matrix for temporaries.
Yes. Pre-book the case, prep and scan the teeth, and send the scans right away. The design team converts the wax-up into a temporary design matched to the prep scan, and you print, cure and seat it in the same appointment. With the case pre-booked, the patient waits about an hour.
Send clean STL intraoral scans of the upper arch, lower arch and bite, plus a natural smile photo of the patient. Use high-resolution photos so proportions stay sharp when you zoom in during the presentation. Those records are enough for the design team to build the presentation, the wax-up and the temporary designs.
Yes. A trial smile is a one-piece, veneer-style try-in that sits over the patient's existing teeth, so they can see and feel the proposed smile before any tooth is touched. It's one of the design files you can choose in the Smile Package, alongside the diagnostic wax-up and temporary designs.
A prep guide shows how much reduction each tooth needs to reach the planned result in the diagnostic wax-up. It works like a surgical guide for implant placement: a roadmap for preparation, so you aren't estimating reduction chairside and the prep matches the smile the patient already approved.
Upload your scans and a smile photo. The design team handles the presentation, the wax-up and the temps from there.


